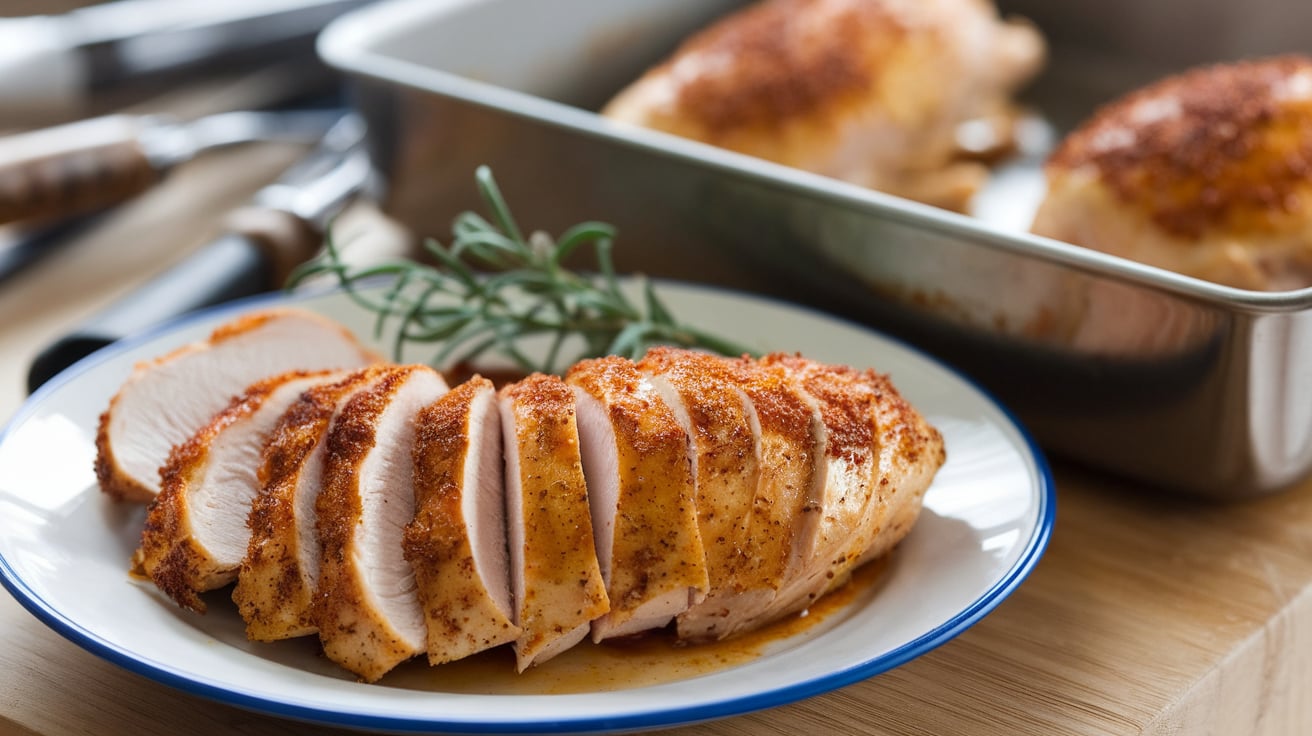
If you’ve ever made boneless skinless chicken breasts, you know how tricky they can be. Without the skin to lock in moisture, they can quickly become dry and bland. But don’t worry – you’re not alone in trying to find the perfect way to cook them! Many of us are looking for the best boneless skinless chicken breast recipes that are easy to make and full of flavor. While I usually reach for chicken with skin on, whether it’s breasts or thighs, to keep it juicy and tender, I completely understand the desire for a leaner option. That’s why I’ve come up with a solution that will make your boneless skinless chicken breasts as delicious and juicy as their skin-on counterparts.
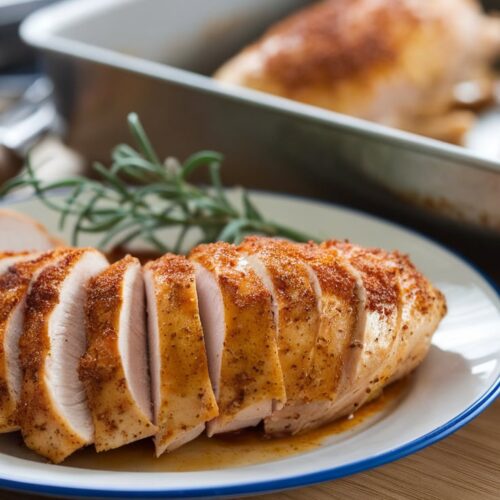
The key to making perfectly moist and flavorful chicken breasts without the skin is using a clever trick that I like to call “Faux Skin.” This method involves using parchment paper and a little oil to trap moisture in, much like the skin would do. It’s a simple yet effective way to cook chicken that doesn’t sacrifice flavor or texture. Not only does this technique preserve the tenderness of the chicken, but it also ensures a juicy and succulent result every time, without the worry of dry meat.
In this recipe, we will break down step-by-step how to prepare boneless skinless chicken breast recipes that will wow your taste buds. No complicated techniques, just easy-to-follow instructions that will help you achieve the perfect meal in no time. Plus, the versatility of this recipe means you can pair it with your favorite sides or seasonings, making it a go-to meal for busy weeknights or special occasions.
Whether you’re cooking for a family dinner, meal prep, or a quick weeknight meal, this method guarantees that your chicken breasts will stay tender, flavorful, and juicy. With just a few simple ingredients and a few minutes of preparation, you can make juicy boneless skinless chicken breasts that will leave everyone asking for more.
Why Boneless Skinless Chicken Breast Recipes Can Be Tricky (And How to Fix It)
Boneless skinless chicken breasts are often seen as a healthy, lean option, but they can also be challenging to cook. Without the skin, the chicken can easily dry out, losing flavor and tenderness. That’s why many people avoid them, but with the right technique, you can still enjoy juicy, flavorful chicken breasts. The key is moisture retention use a few simple tricks like cooking with parchment paper or adding a bit of oil to seal in the juices. This ensures that the chicken stays tender and flavorful throughout the cooking process.
The Best Boneless Skinless Chicken Breast Recipes for Juicy, Tender Meat
Looking for the perfect boneless skinless chicken breast recipes that guarantee juicy and flavorful results? Look no further! Whether you’re grilling, baking, or pan-searing, there are numerous ways to cook boneless skinless chicken breasts without losing moisture. For instance, marinating the chicken in a flavorful mixture can help infuse moisture and enhance the taste. If you’re looking for an easy weeknight meal, try a simple baked boneless skinless chicken breast recipe, or spice things up with a chicken stir-fry. These boneless skinless chicken breast recipes are not only delicious but also versatile, so you can customize them to suit any taste.
How to Season Boneless Skinless Chicken Breast Recipes for Maximum Flavor
The seasoning is the key to transforming your boneless skinless chicken breasts from plain to absolutely delicious. Since chicken is naturally mild, it takes on the flavors you give it, making seasoning a critical part of the process. Use a mix of spices, herbs, and even a bit of citrus or garlic to bring out the natural flavors. A simple salt and pepper rub can work wonders, or you can try an Italian seasoning blend for a Mediterranean twist. The right seasoning can make your chicken breasts the star of any meal!
Jump To:
💌 Let’s Stay Together
There are so many great ways to receive all of our latest recipes, meal tips, and inspiration.
Follow Us
Ingredients Overview
For exact measurements, see the recipe card below.
Key Ingredients for Juicy Boneless Chicken Breasts
- Boneless Skinless Chicken Breasts – The star of the dish! Choose fresh, evenly sized breasts for consistent cooking.
- Olive Oil or Your Favorite Cooking Oil – Adds moisture and enhances flavor; also helps the “faux skin” method with parchment paper to create a crispy texture.
- Salt and Pepper – Essential for seasoning and drawing out natural flavors.
- Optional Seasonings and Herbs – Customize with garlic powder, paprika, or thyme to add depth and aroma.
This blend of ingredients ensures juicy, tender chicken every time. You can experiment with additional spices to make it your own!
Instructions Overview
- Prep the Chicken – Start by patting the boneless chicken breasts dry with paper towels to help them sear evenly. Season both sides with salt, pepper, and any optional herbs or spices.
- Set Up Faux Skin – Use a piece of parchment paper lightly coated with oil. Place it over the chicken breasts in the pan. This will act like “faux skin,” trapping moisture and helping to create a beautifully browned exterior.
- Cook on Medium Heat – Heat oil in a skillet over medium. Place the chicken breasts in the pan and cover with the oiled parchment paper. Cook for a few minutes on each side until golden brown and cooked through, ensuring juicy results.
- Let Rest and Serve – Remove the chicken from the skillet and let it rest for a few minutes to lock in juices before slicing.
This method guarantees tender, flavorful boneless chicken breasts every time.
Equipment Overview
- Skillet or Frying Pan – Use a medium or large-sized skillet to allow each chicken breast to cook evenly.
- Tongs – Helpful for flipping the chicken without losing juices or disturbing the parchment.
- Parchment Paper – Key to the “faux skin” technique, it helps lock in moisture and prevents sticking.
- Meat Thermometer – Optional, but useful for checking doneness. Chicken should reach an internal temperature of 165°F (74°C).
- Paper Towels – For patting the chicken dry before cooking, which helps achieve a better sear.
This equipment list covers all the basics you need to ensure perfectly cooked, juicy boneless chicken breasts.
boneless chicken breast recipe
Equipment
- 1 Skillet or Frying Pan 10-12 inches in diameter
- 1 Tongs
- 1 Parchment paper sheet large enough to cover the chicken breasts in the pan
- 1 Meat Thermometer optional but highly recommended for precise cooking
- 1-2 sheets Paper Towels for drying the chicken before cooking
Ingredients
- 4 pieces Boneless, Skinless Chicken Breasts
- 2 tablespoons Olive Oil or your preferred cooking oil
- 1/2 teaspoon Salt or to taste
- 1/4 teaspoon Black Pepper or to taste
- 1/2 teaspoon Optional Seasonings Garlic Powder, Paprika, Thyme, etc.
Instructions
Prepare the Chicken :
- Pat the boneless chicken breasts dry with paper towels to remove any excess moisture. This helps the chicken to sear properly, creating a crispy exterior.
- Season both sides of the chicken breasts generously with salt, pepper, and any additional spices or herbs you prefer (such as garlic powder, paprika, or thyme).
Prepare the Skillet :
- Heat 2 tablespoons of olive oil (or your preferred cooking oil) in a large skillet over medium heat. Allow the oil to heat up for about 1-2 minutes until it shimmers.
Cook the Chicken:
- Once the oil is hot, place the seasoned chicken breasts in the skillet. For best results, avoid overcrowding the pan; you may need to cook the chicken in batches depending on the size of your skillet.
- Cook the chicken for about 6-7 minutes on the first side until golden brown. Then, flip the chicken breasts using tongs and cook for an additional 5-7 minutes on the other side.
- If you want to ensure that the chicken is cooked through, use a meat thermometer to check the internal temperature. It should read 165°F (74°C).
Rest the Chicken :
- Once the chicken is fully cooked, remove it from the skillet and place it on a cutting board or plate. Let the chicken rest for 5 minutes before slicing. This allows the juices to redistribute and ensures the chicken stays tender and juicy.
Serve :
- Slice the chicken breasts against the grain and serve with your favorite side dishes, such as roasted vegetables, mashed potatoes, or a salad.
Video
Notes
- Chicken Thickness: If your chicken breasts are particularly thick, you might want to consider butterflying them (cutting them in half horizontally) or pounding them with a meat mallet to ensure even cooking. This will help the chicken cook faster and more evenly.
- Cooking Time: Keep an eye on the chicken while it’s cooking. Overcooking can lead to dryness, so it’s best to use a meat thermometer to ensure the chicken reaches an internal temperature of 165°F (74°C). This guarantees the chicken is safe to eat and still juicy.
- Resting the Chicken: After cooking, always let your chicken rest for at least 5 minutes. This allows the juices to redistribute throughout the meat, preventing it from drying out when you cut into it.
- Seasoning Variations: Feel free to customize the seasoning based on your preferences. You can add garlic powder, paprika, cayenne pepper, or fresh herbs like rosemary or thyme for extra flavor.
- Oil Substitutes: If you don’t want to use olive oil, you can substitute with vegetable oil, avocado oil, or even butter for a richer flavor. Keep in mind that this may change the calorie count slightly.
- Serving Suggestions: This recipe pairs well with a variety of sides such as roasted vegetables, mashed potatoes, quinoa, or a fresh salad. It’s a versatile dish that can fit many meal plans and cuisines.
Storage Tips
- Refrigeration : After cooking your boneless chicken breasts, make sure to store them in an airtight container. They can be kept in the fridge for up to 3–4 days. This will help preserve their moisture and freshness.
- Freezing : If you want to store your cooked chicken for a longer period, freezing is a great option. Place the chicken breasts in a freezer-safe bag or airtight container, and make sure to squeeze out as much air as possible to avoid freezer burn. Cooked chicken can be frozen for up to 3 months. When you’re ready to eat it, thaw it overnight in the fridge or reheat it in the microwave or on the stovetop.
- Storing Leftovers : For leftover chicken, it’s best to cut it into slices or chunks before storing it, as this can make reheating more even and convenient. If you’re adding chicken to salads or sandwiches later, this will make serving much easier.
- Reheating : When reheating, try to add a splash of water or broth to keep the chicken moist. Reheat it in a covered dish in the microwave, on the stovetop, or in the oven at a low temperature to avoid drying it out.
By following these simple storage tips, you can keep your boneless chicken breasts tasting just as fresh and juicy as when they were first cooked!

