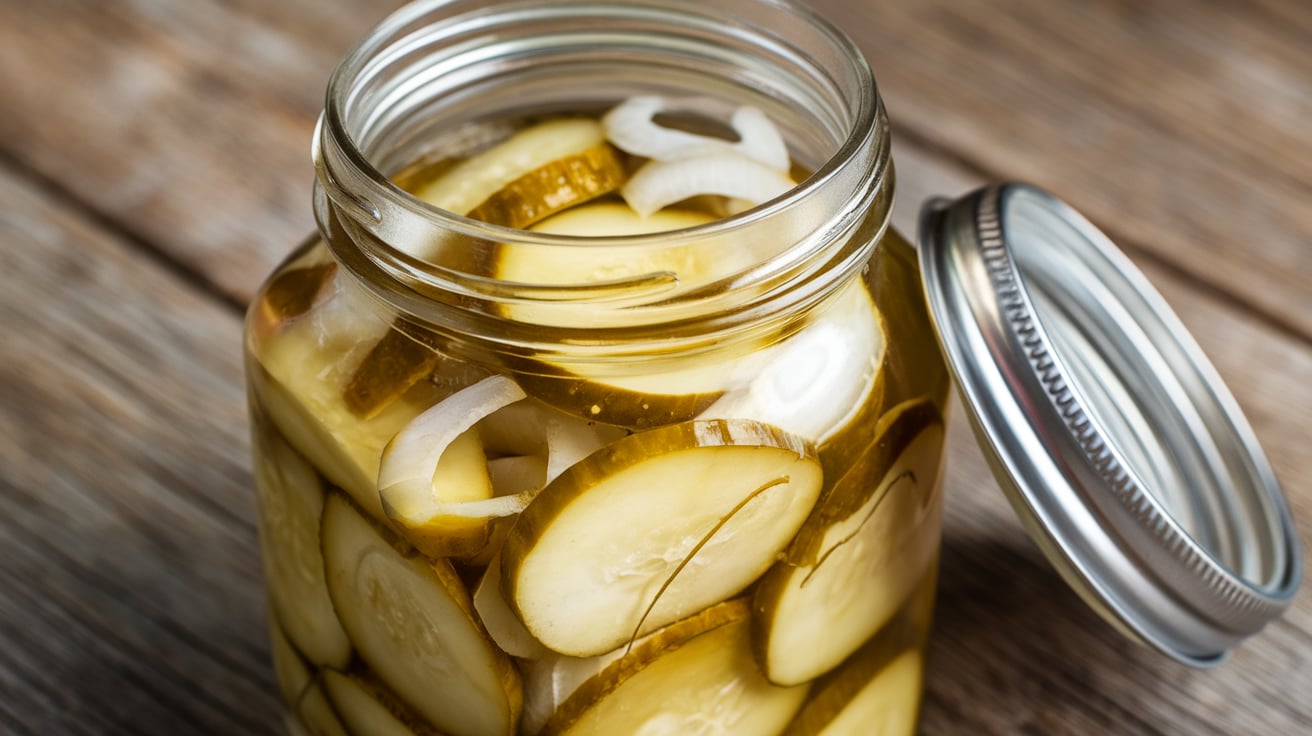
Bread and butter pickles are a timeless favorite, balancing sweetness with a bit of tanginess in each crunchy bite. Whether you’re making them for a party or simply enjoying them on a sandwich, these pickles are sure to impress family and friends. Making these pickles at home means you get the freshest taste, control over the ingredients, and the satisfaction of creating something homemade that’s both delicious and rewarding.
In addition, with just a few common ingredients, you can make your own bread and butter pickles at home in no time. This recipe keeps it simple with cucumbers, onions, vinegar, sugar, and a handful of pantry spices. First, you slice the cucumbers and onions, then create a quick brine with the vinegar and spices, and finally, let the vegetables soak in all that flavor. The result? A jar of pickles with a unique blend of sweetness, a touch of tartness, and a satisfying crunch. What’s even better? This recipe doesn’t require any canning just pop them in the fridge, and you’re all set.
Moreover, one of the great things about making these pickles yourself is that you can easily customize the flavor. Want them a little sweeter? Add a touch more sugar. Prefer a bit more spice? Simply sprinkle in extra mustard seeds or even some crushed red pepper flakes. Since these are refrigerator pickles, you can adjust the seasoning until you find the perfect balance to match your taste.
Bread and butter pickles are fantastic to have on hand for picnics, barbecues, or as an everyday addition to lunch or dinner. In fact, their flavor complements everything from sandwiches to grilled meats, making them versatile and popular with almost any meal. Once you try this recipe, you’ll see why homemade bread and butter pickles are a pantry staple worth keeping around.
So, let’s get started and enjoy a recipe that’s easy, fun, and full of flavor!
Why This Recipe is the Best Bread and Butter Pickles
This homemade bread and butter pickles recipe stands out because it’s simple, customizable, and packed with the perfect blend of flavors. Unlike store-bought versions, making these pickles at home gives you control over the sweetness, tang, and spice, so you can fine-tune the flavors to match exactly what you love.
The recipe requires just a few ingredients you may already have on hand, like cucumbers, onions, vinegar, and spices. The best part? It doesn’t require any canning equipment or complicated steps. This quick-pickle method means you get fresh, crisp pickles that are ready to eat in just a few hours, though the flavor only gets better the longer they sit in the fridge.
One reason this recipe is a favorite is its balanced taste. With just the right amount of sugar and vinegar, these pickles deliver a subtle sweetness and a hint of tartness, creating that classic bread-and-butter flavor. The blend of spices—like mustard seeds, celery seeds, and turmeric—adds a warm, aromatic depth, making every bite even more delicious. And because these are refrigerator pickles, they retain a satisfying crunch that’s often lost with canned pickles.
Another reason this recipe shines is its versatility. Bread and butter pickles are a wonderful addition to so many dishes, from sandwiches and burgers to charcuterie boards and salads. They bring a vibrant, fresh taste to anything you pair them with. Plus, with this recipe, you can experiment by adding other spices, like a bit of chili for heat or garlic for extra flavor, making it uniquely yours.
Ultimately, this bread and butter pickles recipe is the best because it’s easy, adaptable, and loaded with flavor. Perfect for beginners and pickle enthusiasts alike, it’s a go-to recipe that keeps your fridge stocked with a homemade treat everyone will love.
Jump To:
💌 Let’s Stay Together
There are so many great ways to receive all of our latest recipes, meal tips, and inspiration.
Follow Us
Ingredients Overview
This bread and butter pickles recipe uses simple ingredients to create that perfect balance of sweet, tangy, and slightly spicy flavor that makes it so memorable. Here’s a detailed look at each ingredient and its role in creating the best homemade pickles:
- Cucumbers:
- Fresh, firm cucumbers are the stars of the recipe. For the best results, try to use pickling cucumbers, which are typically smaller, crunchier, and perfect for pickles. If you can’t find pickling cucumbers, regular ones will also work; just be aware they might turn out softer after pickling.
- Onion:
- Thinly sliced onion adds extra flavor and a touch of mild sweetness. The onions will absorb some of the brine as well, making them a flavorful addition to your pickles.
- Kosher Salt:
- This salt helps draw moisture out of the cucumbers before pickling, which is key to keeping the cucumbers crisp. It also adds a bit of flavor to the final product. Avoid table salt, as it can make the pickles cloudy due to anti-caking agents.
- White Vinegar:
- This is the main acid in the brine, giving the pickles their characteristic tang. White vinegar has a strong, sharp flavor that’s ideal for pickling and helps preserve the cucumbers for longer shelf life.
- Apple Cider Vinegar:
- A secondary vinegar, apple cider vinegar has a slightly fruity flavor that balances out the sharpness of the white vinegar. This combination adds a nice layer of complexity to the flavor.
- Granulated Sugar:
- Sugar is essential for achieving that classic bread and butter pickle taste. It gives the pickles their sweetness and offsets the acidity from the vinegars, creating a balanced flavor that’s both tangy and sweet.
- Mustard Seeds:
- These tiny seeds add a little bit of crunch and a mild peppery flavor. They’re a traditional ingredient in pickling that gives an extra hint of spice.
- Celery Seeds:
- Celery seeds have a unique, earthy flavor that works well in pickles. They bring a slightly peppery, herbal note that adds depth to the pickling brine.
- Ground Turmeric:
- Turmeric not only gives the pickles a beautiful yellow color, but it also adds a subtle, warm spice that complements the other flavors in the brine. A little goes a long way!
Together, these ingredients create a perfectly balanced brine that infuses each cucumber slice with flavor. The end result is a pickle that’s crunchy, flavorful, and addictive, making it the ideal condiment for burgers, sandwiches, or just snacking on its own.
Equipment Needed
Making homemade bread and butter pickles is a simple process, but having the right equipment makes it much easier. Here’s a breakdown of the essential tools you’ll need to prepare and store your pickles.
- Large Mixing Bowl:
- This bowl is where you’ll mix the cucumbers, onions, and salt to draw out excess moisture. It’s important to choose a large enough bowl to allow the ingredients to be well-mixed and for the salt to work its magic. A plastic or glass bowl works best, as metal can react with the salt and affect the flavor.
- Colander:
- After salting the cucumbers and onions, they will release water. The colander is used to drain off this excess liquid. This step helps to keep the pickles crunchy by removing moisture, which could make them soggy if left in. Be sure to choose a colander with small enough holes to avoid losing any cucumbers!
- Large Pot:
- A large pot is necessary to heat the brine. It’s where you’ll combine vinegar, sugar, and your spices. The pot should be large enough to hold the liquid and allow it to simmer without overflowing. A sturdy pot ensures that the brine is heated evenly and that the spices mix thoroughly.
- Measuring Cups and Spoons:
- These tools are key to getting the right balance of ingredients for your brine. Accurate measurements are important to ensure that the flavor is just right. A set of dry measuring cups, along with spoons for smaller amounts of spices, will help you avoid over- or under-seasoning the brine.
- Slotted Spoon:
- A slotted spoon is used to scoop out the cucumbers and onions after they’ve been mixed with the salt and vinegar. It helps you leave behind any excess liquid, which ensures that only the perfect amount of brine goes into your jars. The slotted spoon allows the cucumbers to stay crisp and not too soggy.
- Canning Jars with Lids:
- The jars are essential for storing your pickles once they’ve been made. Mason jars are the most common choice as they seal tightly and preserve the pickles well. You’ll need to sterilize the jars before use to prevent any bacteria from spoiling the pickles. Clean, airtight jars are key to keeping your bread and butter pickles fresh for weeks.
- Canning Funnel (Optional):
- If you’re using mason jars for storage, a canning funnel can be incredibly helpful. This funnel allows you to pour the brine into the jars without spilling. It makes the process much cleaner and easier, especially when dealing with hot liquid.
With these tools, you’ll be ready to prepare and store your bread and butter pickles with ease. Each piece of equipment serves an important function in ensuring the pickles turn out crisp, flavorful, and perfectly preserved. By having everything you need on hand, you can focus on enjoying the process and looking forward to your homemade pickles!
Step-by-Step Instructions
Making homemade bread and butter pickles is an enjoyable process that’s simple yet rewarding. By following these easy steps, you’ll create a batch of crisp, tangy, and sweet pickles in no time. Here’s a straightforward guide to help you make the best bread and butter pickles:
- Prepare the Cucumbers and Onions:
- Start by washing your cucumbers thoroughly. Slice them into thin rounds or half-moons, depending on your preference. You can leave the skins on for extra crunch, or peel them if you prefer a smoother texture. Slice the onions thinly as well. In a large mixing bowl, combine the cucumber slices, onion slices, and salt. Toss the mixture to evenly coat the vegetables with the salt. Let them sit for about 1-2 hours to draw out excess water. This helps keep the pickles crisp and firm.
- Drain the Vegetables:
- After the cucumbers and onions have had time to release moisture, place a colander in the sink and transfer the vegetable mixture into it. Allow them to drain well for about 15 minutes. You’ll notice that a lot of liquid will have been drawn out by the salt, which is exactly what you want.
- Make the Brine:
- In a large pot, combine vinegar, sugar, mustard seeds, celery seeds, turmeric, and ground ginger. Stir the mixture over medium heat until the sugar dissolves completely. Bring the brine to a boil and then reduce the heat, allowing it to simmer for about 5 minutes. The brine should be fragrant and well-combined by this point.
- Add the Vegetables to the Brine:
- Once the brine is ready, add the drained cucumber and onion mixture to the pot. Stir to make sure the vegetables are well-coated with the brine. Let the mixture simmer for about 5 minutes to allow the cucumbers and onions to soften just slightly while absorbing the brine’s flavors.
- Pack the Vegetables into Jars:
- Carefully spoon the hot cucumber and onion mixture into sterilized mason jars, packing them tightly but not too tightly. Leave about ½ inch of space at the top of each jar. This ensures that the brine will cover the vegetables fully during storage.
- Pour the Brine Over the Vegetables:
- Using a ladle or a measuring cup, pour the hot brine over the cucumbers and onions in the jars, making sure the vegetables are completely submerged. You may need to tap the jars gently to release any air bubbles. If necessary, add more brine to ensure the vegetables are fully covered.
- Seal the Jars:
- Place the lids on the jars and screw them on tightly. Make sure they are properly sealed, as an airtight seal is essential for preserving the pickles. If you’re planning to store the pickles for a longer time, you can process the jars in a water bath canner for about 10-15 minutes to ensure they are fully sealed.
- Cool and Refrigerate:
- Let the jars cool completely at room temperature. Once cool, place the jars in the refrigerator. While the pickles will be ready to enjoy in as little as 24 hours, they’ll develop more flavor the longer they sit. The pickles should last for up to 3 weeks in the fridge.
Enjoy your homemade bread and butter pickles as a tangy snack, or serve them alongside your favorite dishes for a burst of flavor. They’re the perfect addition to sandwiches, burgers, or even as a side to your favorite salads. With these simple steps, you’ll be enjoying fresh, delicious pickles in no time!
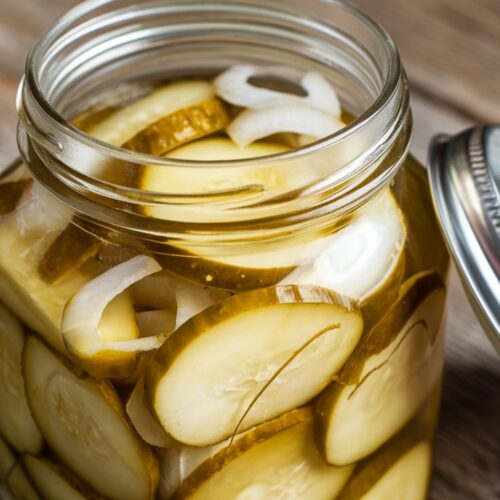
bread and butter pickles Recipe
Equipment
- Large Mixing Bowl
- Colander
- Medium saucepan
- Measuring cups and spoons
- Jar Tongs
- Sterilized Jars
- Lid Sealer
Ingredients
- 4 Cups cucumber slices about 2-3 medium cucumbers
- 1 large onion, thinly sliced
- 1/4 cup Kosher Salt
- 1 cup white vinegar
- 1 cup Apple Cider Vinegar for the tangy kick
- 2 cups sugar
- 1 tablespoon mustard seeds
- 1 tablespoon celery seeds
- 1 teaspoon turmeric
- 1/2 teaspoon ground ginger
Instructions
- Slice the Cucumbers and Onion: Thinly slice the cucumbers and onion.
- Salt the Vegetables: Mix cucumbers and onion with salt. Let it sit for 1 hour to draw out excess water
- Rinse and Dry: Rinse the cucumbers and onions to remove excess salt. Pat them dry with a paper towel
- Prepare the Brine: In a saucepan, combine white vinegar, apple cider vinegar, sugar, mustard seeds, celery seeds, turmeric, and ground ginger. Bring to a simmer
- Combine the Vegetables with Brine: Add the cucumbers and onions to the brine. Stir and simmer for 5–10 minutes
- Pack into Jars: Pack the cucumbers and onions into sterilized jars. Pour the hot brine over them
- Seal and Cool: Seal the jars with lids and let them cool to room temperature
- Refrigerate: Place the jars in the fridge for at least 24 hours before serving
Notes
- For a spicier kick, add red pepper flakes or a dash of hot sauce to the brine.
- You can store these pickles for up to 3 weeks in the fridge.
- For extra crunch, refrigerate the cucumbers in salted water for a few hours before starting the recipe.
Storage Tips
Proper storage of your homemade bread and butter pickles is essential for keeping them fresh and maintaining their crunchy texture. With the right care, you can enjoy your pickles for weeks after making them. Follow these simple steps to keep your pickles at their best:
- Refrigerate Immediately:
- As soon as you’ve sealed your pickles in jars, place them in the refrigerator. This will help keep them fresh and preserve their flavor. Cold temperatures slow down any unwanted bacteria growth, so they stay safe to eat.
- Use Airtight Jars:
- It’s important to store your pickles in airtight containers or jars. This prevents air from getting inside and helps maintain their flavor and crispiness. Make sure the lid is tightly sealed to avoid any spoilage.
- Wait Before Eating:
- Although you may be tempted to dive in right away, it’s best to let your pickles sit in the fridge for at least 24 hours. This gives the flavors time to develop and fully infuse into the cucumbers, making them more flavorful.
- Consume Within 2-3 Weeks:
- For the best taste and texture, try to eat your pickles within 2 to 3 weeks. After this period, the flavor may start to fade, and the pickles might become softer. Be sure to check them for any signs of spoilage, like an off smell or discoloration.
- Keep It Clean:
- Always use clean utensils when removing pickles from the jar. This helps prevent contamination and ensures your pickles stay fresh for longer.
By following these easy tips, you’ll be able to enjoy your homemade bread and butter pickles at their freshest and most delicious for as long as possible. Enjoy!

